Groups
Last Updated: 2022-01-25Groups require at least one Property (which requires a source and an App). See here if you haven't created a Property yet.
Groups are where the magic happens in Grouparoo. (It's in the name, after all!) Groups are a segment or cohort of Records. They are useful in that you can use Groups to target a specific set of Records to export to some Destination. See here to learn more about the core concepts in Grouparoo.
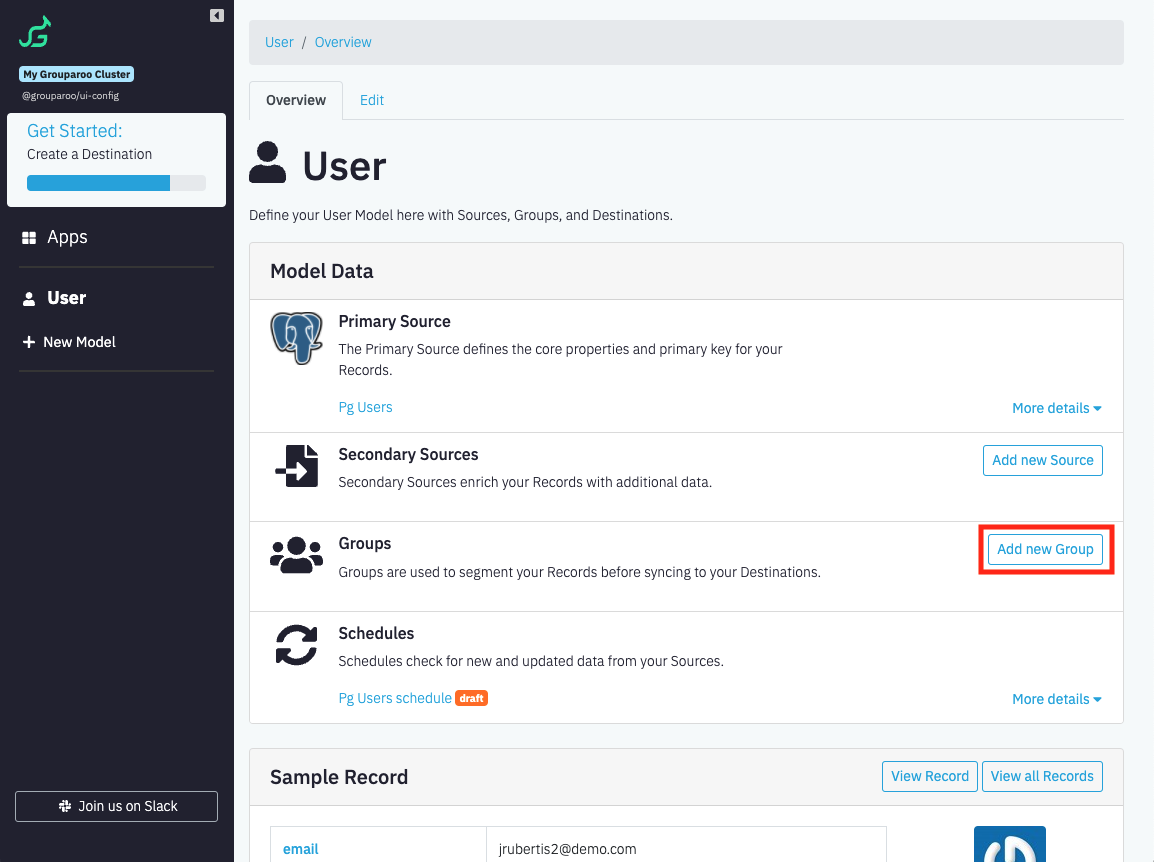
Step 1: Add a Group
To add a Group, select your Model from the navigation bar and click the "Add new Group" button.

This will take you to a page where you can name your Group.

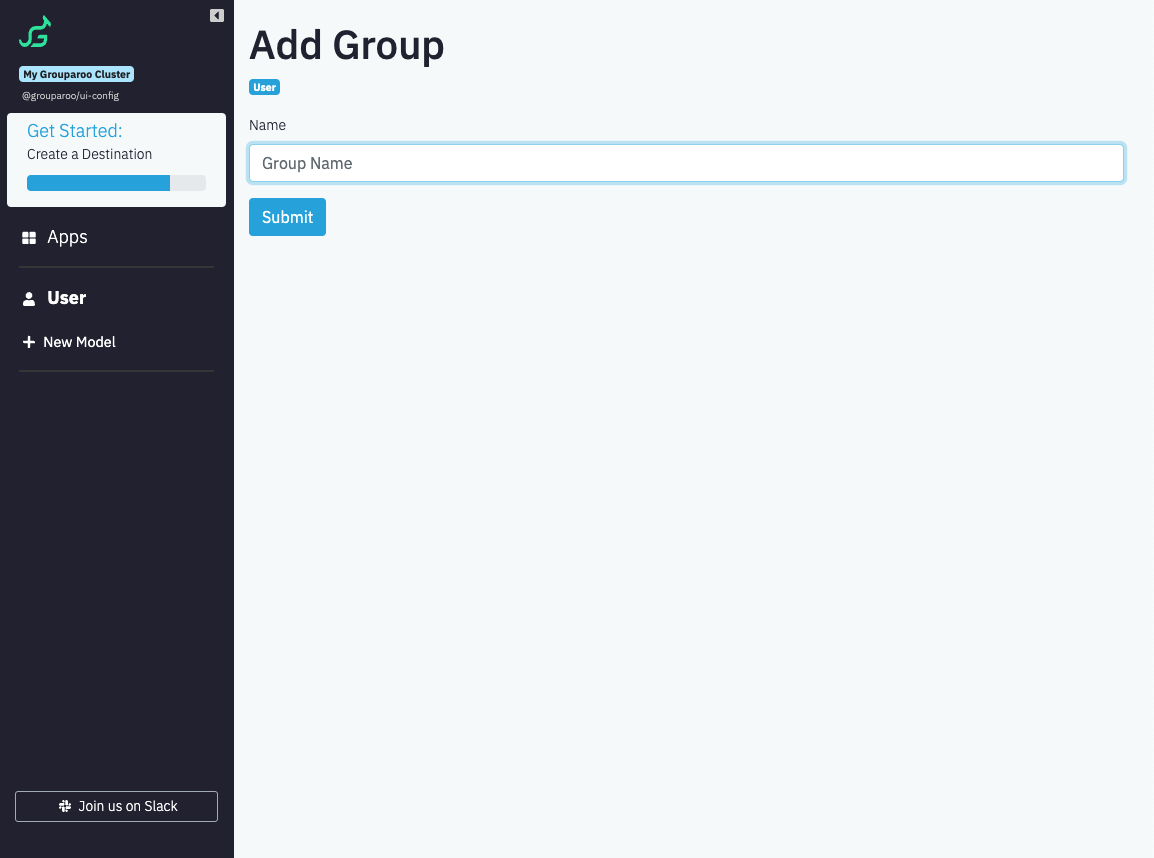
Step 2: Configure Group
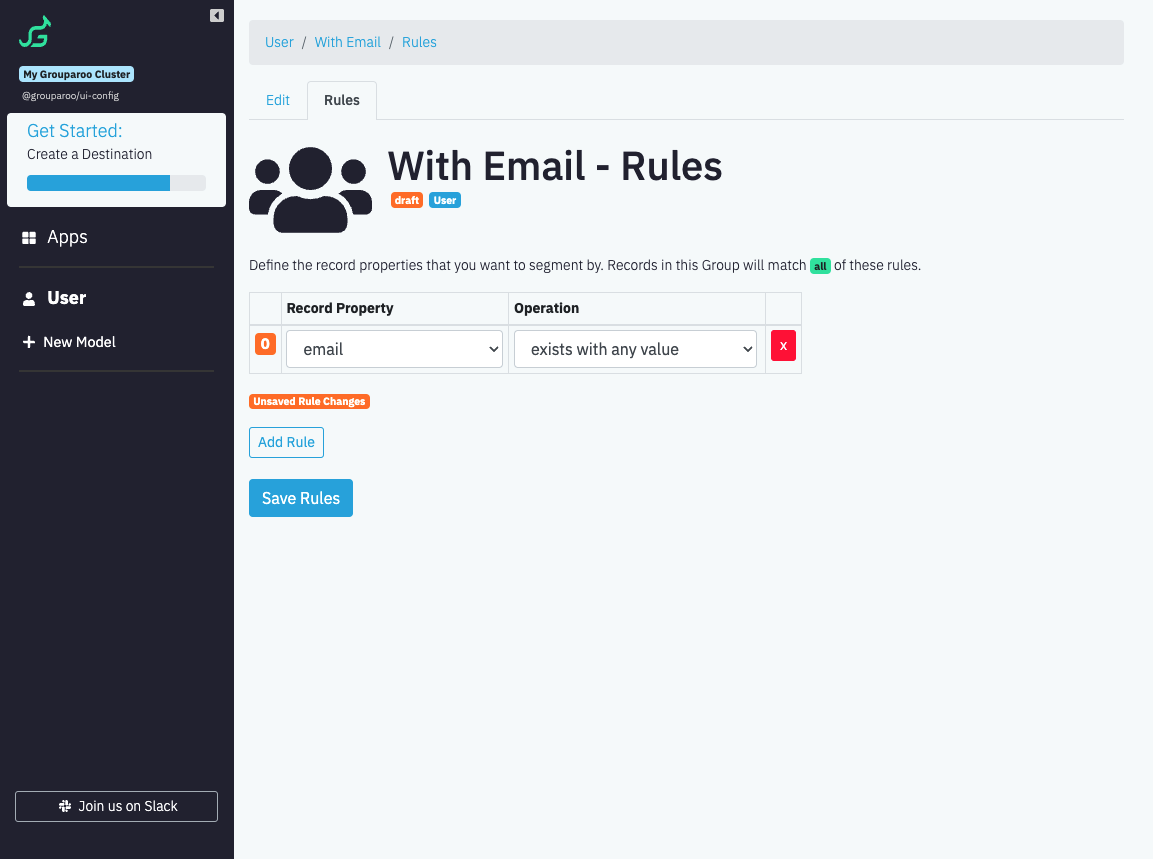
Groups add and remove Records automatically based on Group Rules that you define. Each rule has several options for logically determining if a Record belongs in the Group.
After creating a Group, you will be able to define the rules for that Group.

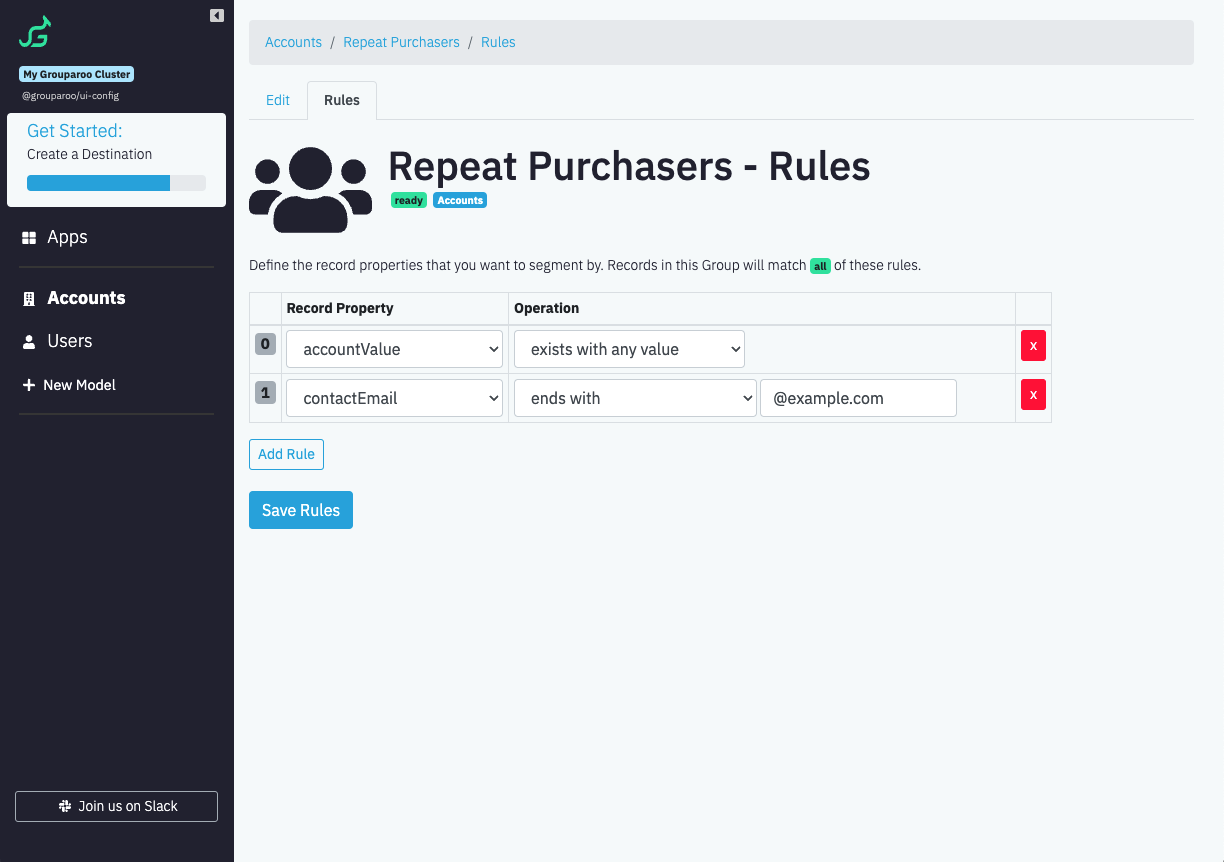
Examples
Here are a few different examples of Groups and their rules:
Example: Repeat Purchasers
Group Rules:
- Records who have purchased more than once
- Records with an email

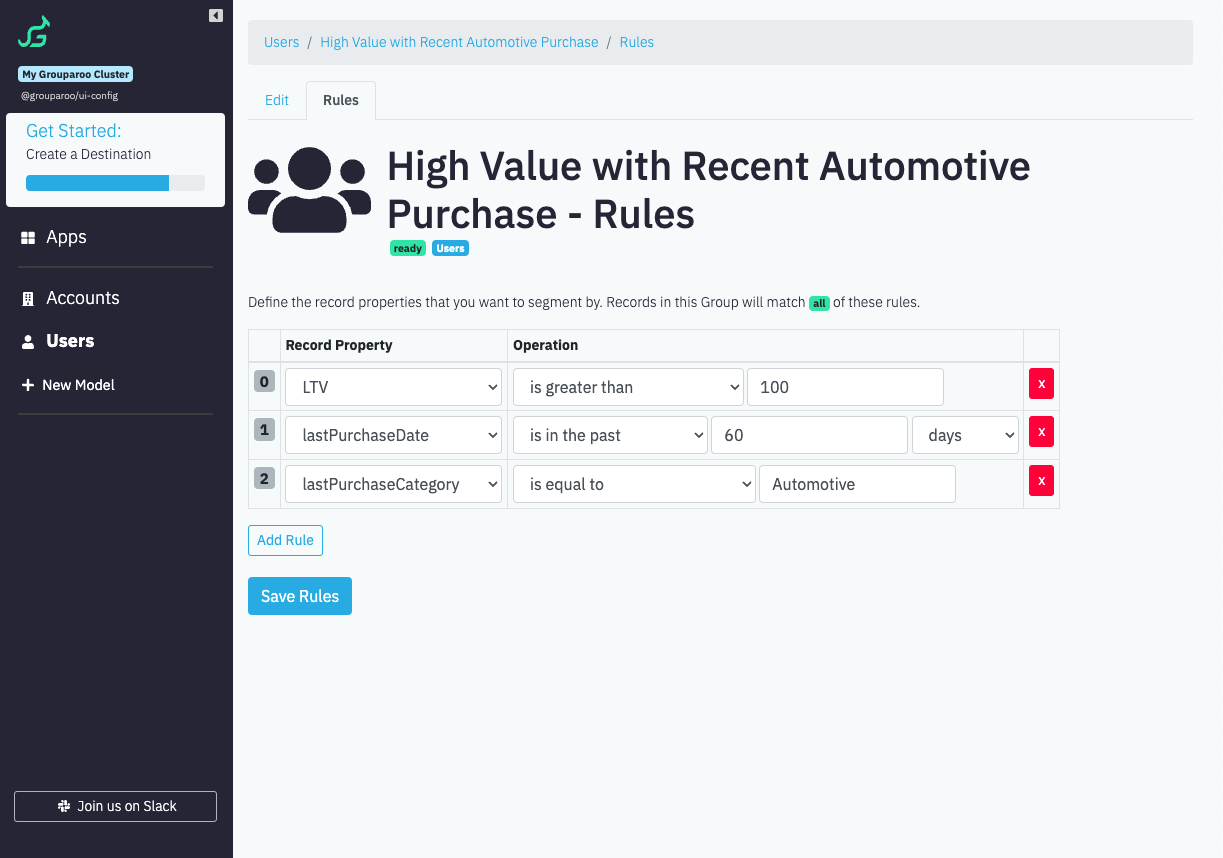
Example: High Value with Recent Automotive Purchases
Group Rules:
- Records who have a Life-time Value (LTV) of over 100
- Records who have purchased in the last 60 days
- Records with the Automotive purchase category

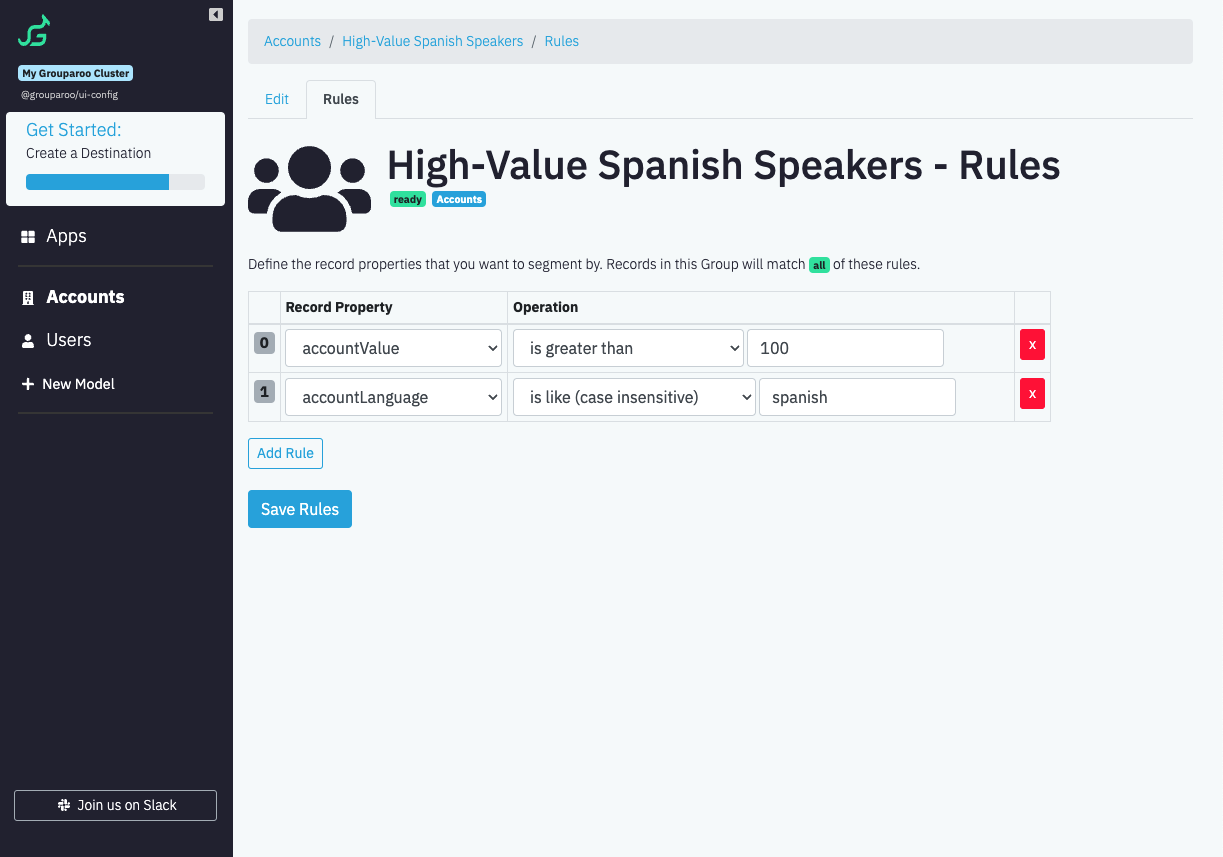
Example: High-Value Spanish Speakers
Group Rules:
- Records who have an account value of 100 or greater
- Records with a language set to
spanish

Generated Config File
Grouparoo's UI Config will write a JSON file to your local filesystem based on your inputs. That file will be placed in the config/groups directory in your Grouparoo project. You can further edit this file locally or through the UI Config.
Next Steps
Once you've grouped your users, you're ready for the last step in the Grouparoo configuration journey, adding Destinations.
Add a DestinationHaving Problems?
If you are having trouble, visit the list of common issues or open a Github issue to get support.