The Grouparoo Blog
Integrating Mailchimp with your Node.js App
Tagged in Connections EngineeringBy Yashovardhan Agrawal on 2021-06-27
This is a step-by-step guide that will help you integrate Mailchimp with your Node.js application using Mailchimp's API. We'll begin by walking through the process manually, and end by showing you an easier approach that lets Grouparoo do all the heavy lifting for you.
Getting started
To get started, you'll be needing the following things prepared:
- A Mailchimp Account
- Node.js & npm installed on your machine
- A basic frontend application to send requests to your Node.js application.
This guide will help you make a sample Node.js application with Express to send and receive API requests and responses. Although a basic knowledge of Node.js would be helpful, you can easily follow the steps given and get started with your application.
Setting up your Mailchimp account
Setting up your Mailchimp account is a relatively simple process. In this tutorial, we're assuming that you have created a free Mailchimp account and are looking to integrate it within your application. The process is pretty similar for premium accounts, just that you can create multiple audiences, each having their separate Audience ID. To integrate your app with Mailchimp, we need two pieces of information from your account:
- Mailchimp Account API Key
- Audience ID
Getting your API Key
For integrating your app, the first and most important thing needed is an API Key. This is a relatively easy step; have a look at the steps below.
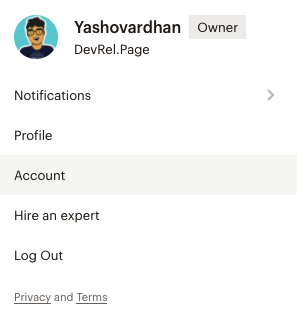
- Go to the bottom left corner of the screen and click on the Account option.
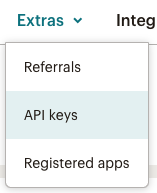
- On the Account page, you’ll find a menu. Click on Extras and find the API Keys option.
- If you’re opening this up for the first time, you’ll see a screen similar to this one here. You need to have an API key to integrate your Mailchimp account to your NodeJS application. To do this, click on Create A Key.

- Once you click on it, you’ll see that Mailchimp has created an API key for you! It will look something similar to this here
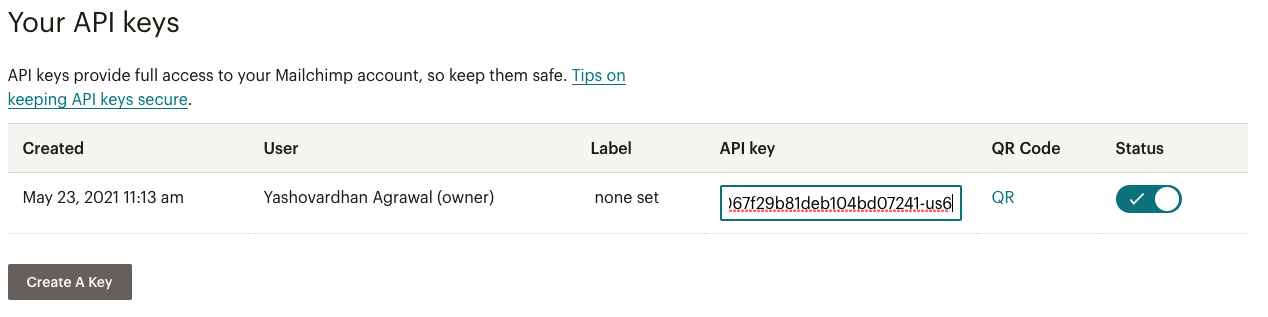
We have displayed the latter portion of our API Key in the image above. One thing to note here are the last three characters after the -. This represents the data center corresponding to your account, which is for all the API calls one can make. For us, it is us6. This might be different for you, so make sure to note this separately. You can also checkout the Mailchimp documentation which about API Keys.
Finding your Audience ID
Next up, we need to find our Audience ID. For this, just follow this 2 step process :)
- Go to the audience tab and click on All contacts.
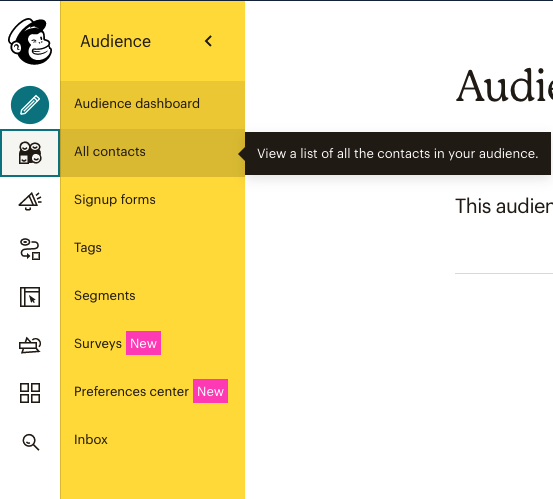
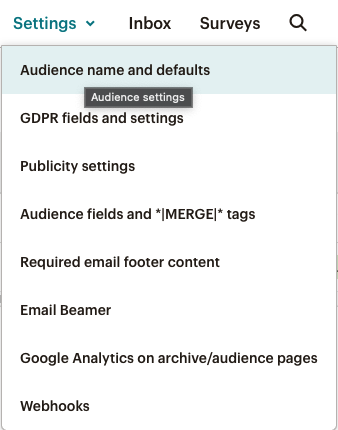
- You'll see a screen with all your contact details mentioned. Go to the settings tab and click on Audience name and defaults.
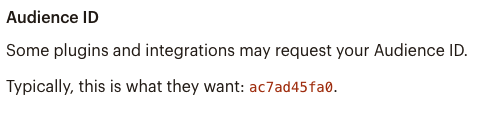
- You can find your Audience ID, which will look something similar to this here!
If you're facing any difficulties, you can also checkout the Mailchimp Documentation to find your Audience ID.
Setting up your Node.js Application
We're assuming that you have a sample frontend application for this tutorial, where users can quickly enter their email and click on the signup button to register on your mailing list.
Here's what a sample request from the frontend might look like:
let submit = document.getElementById('submit');
let email = document.getElementById('email').value;

submit.addEventListener('click', (event) => {
  event.preventDefault();

  if(this.email.value == null || this.email.value == "") {
    alert("error: email not added");
  } else {
    let fetchData = {
      method: "POST",
      body: JSON.stringify({email: this.email.value}),
      headers: {"Content-Type": "application/json"}
    }

    fetch('/subscribe', fetchData)
      .then(res => {
        if (res.ok) {
          alert("Success!")
        } else {
          alert("Error!")
        }
      })
    }
  })
Here, on click, the function checks for the validity of email and accordingly places a POST request on the '/subscribe' endpoint of our application with the body containing the email value entered by the user.
For simplicity, we're logging in all the error messages into the browser console. If you want to checkout the sample HTML Code associated with this project, please have a look here.
Now, when we have set up our frontend, let's create our backend!
Initiate your package.json
It is time to make a package.json file to capture all the necessary modules required by our project in your repository.
$ npm init
This will ask you for a few project details and initiate a package.json file inside your repository.
Install dependencies
Now it is time to install all our necessary modules for the project. We will require the following modules:
express: Helps us define the routing table and set up middlewares to respond to HTTP Requestsbody-parser: It is responsible for parsing the incoming request bodies in a middleware before we handle it.request: Helps us make HTTP requests
$ npm install express body-parser request
Setting up your app.js file
Perfect, so now we can go ahead and get our hands dirty to write some actual code! But, before that, remember to make a sub directory called public and move your frontend code inside it. This will make sure when we execute the node.js app, your frontend is served alongside.
Inside your project, create a new app.js file.
Let’s do some basic setup here as well, getting our modules imported and connecting the middlewares.
As a first step, let’s import all the modules we just installed:
const express = require("express");
const bodyParser = require("body-parser");
const request = require("request");
We’ll be needing the path as well.
const path = require("path");
Now, let’s define our application quickly.
const app = express();
Now, we need to define our middleware.
- To send the JSON data from the client, we will be using the
express.json()middleware.
app.use(express.json());
- To parse the data that is coming from the POST request, we will be using
body-parser
app.use(bodyParser.urlencoded({extended: false}));
Note that we have set extended to false, which means that the values can only be strings or arrays which is what we need for now.
- Next up, we need to specify the folder which contains your frontend application and connect it to the express server. Here, we’re having a folder named
public, which includes all our frontend code.
app.use(express.static(path.join(__dirname, 'public')))
- Perfect, let's create our
POSTrequest quickly. We're just setting it up to add aconsole.log()to check if everything's working as expected.
app.post('/subscribe', (req, res) => {
    console.log(“I am listening”);
})
- Now let's define the
PORTwhich will host our application.
const PORT = process.env.PORT || 8888;
This sets the value to the environment PORT value in case we're using a cloud hosting or default it to 8888, which is our local machine endpoint.
- Finally, for all this to work, let's start a socket that listens for our connections on the
PORT.
app.listen(PORT, console.log('The server has started!'));
- Woof! That's so much setup for just a basic API request. Let's test our setup up till now. We'll be using the node command for this.
node app
As soon as you run it, you will notice that the terminal says
The server has started!
You can also check your frontend to start a post request by entering the email field. As soon as you do that, you'll notice the terminal says
I am listening
This proves that our server is up and running, and the post request has also gone through. If you do not have a frontend and want to test this, you can easily use a tool like Postman and send a POST request similar to the one we have mentioned above for the frontend application.
Now finally, it is time to do some real fun stuff! Let’s integrate this with Mailchimp!
Connecting your Node.js App to Mailchimp
For this whole process, we’re directly referring to the Mailchimp API Documentation. They have excellent documentation stating all the different things you need to be aware of with extremely detailed resources. Make sure to check that out if you need any additional information that is not mentioned here directly.
We're using the Mailchimp API v3 here with the standard URL route. You can also download the Mailchimp NodeJS module if you want, but that is preferable for larger projects rather than a small integration we're building here today.
Getting your API Endpoint
So the first thing here is to get the URL of your API. If you check the documentation, the URL looks something like https://<dc>.api.mailchimp.com/3.0
Here the <dc> corresponds to the data center applicable for your account. If you go back to step 4 of Getting your API Key, you can see that for us, the data center is us6. Hence for us, the URL looks something like https://us6.api.mailchimp.com/3.0
Now we have to navigate to the particular list where this API will go and hit before we can start doing operations in it. You can see from step 4 of Finding your Audience ID that our Audience/ List Id is ac7ad45fa0. So finally out endpoint URL will look something like
https://us6.api.mailchimp.com/3.0/lists/ac7ad45fa0
Signing up a user to your mailing list
So currently, as we can see from our earlier setup, our server is listening to /subscribe. However, it is not doing anything other than just letting us know, in the console, that it is working. Now, we’ll be grabbing the request from here and directing it later to the Mailchimp API.
So, let’s grab our email from the request quickly.
app.post('/subscribe', (req, res) => {
   const {email} = req.body;
})
Perfect, now with that in place, let’s make the data we’ll be passing to our Mailchimp. We’ll be naming the object as addData. As per the Mailchimp Documentation, this object accepts a property called members. The members property accepts multiple objects, but here we’ll be just looking for two,
email_address: Email address for a subscriber.status: Subscriber's current status. Possible values:subscribed,unsubscribed,cleaned, orpending. We’ll be usingpendingas the status here since it helps us create a double opt-in list. Mailchimp on our behalf will automatically send out the confirmation email if the status is pending. Once a person clicks the link and verifies, their email will show up in your Audience List!
app.post('/subscribe', (req, res) => {
   const {email} = req.body;
   const addData = {
         members: [
            {
               email_address: email,
               status: ‘pending’
            }
         ]
   }
})
So finally, we need to JSON.stringify() this so that it can be passed on to the Mailchimp API.
addDataJson = JSON.stringify(addData);
Perfect, so this is done. But this was just the data. Let’s structure the request to be sent as well. We will be making an options object for this. This contains the following properties:
url: The API Endpoint we created above containing yourList IDas well.method: This is a post request, soPOST.headers: This contains all the important information like Authorization. We’ll be passing over yourAPI Keyhere.body: Here we’ll be passing over the actual body, ieaddDataJson.
The code will look something like this:
const options = {
   url: ‘https://us6.api.mailchimp.com/3.0/lists/ac7ad45fa0’,
   method: ‘POST’,
   headers: {
      Authorization: ‘auth <YOUR_API_KEY>’
   },
   body: addDataJson
}
Perfect, now it is time for sending this request over to Mailchimp, yay! For this we will be using the request module we previously imported.
request (options, (error, response, body) => {
   if(error) {
      res.json({error}) // error :(
   } else {
      res.sendStatus(200); //successful :)
   }
})
And that’s it! We’re done with the code here! You have successfully made way for people to opt-in for your mailing list! You can also view the full file containing the code here
Alternative Method - Using an off the shelf solution
As you can see, just to configure a single API function, we needed to go through a considerable integration pain, which again is a code you need to maintain regularly. What I generally use and recommend to you all is definitely, Grouparoo.
Grouparoo is a data syncing platform that connects directly to your product database, allows you and your team to define what customer data you care about, and then syncs that data to Mailchimp. The best part, the tool is fully open source! You can easily choose between a self-hosted or a cloud offering. Using this will be just a matter of minutes to build this integration, and anyone can easily use the GUI to configure it! Checkout this example app that connects SQLite data to Mailchimp.


Tagged in Connections Engineering
See all of Yashovardhan Agrawal's posts.
Yash is an Open Source Developer Evangelist and a total Javascript nerd. He loves sharing his ideas, through writings, talks or just being around at hackathons and tech events. While not coding, you can always find Yash singing some random Indian bollywood song!
Learn more about Yashovardhan @ https://yashovardhan.dev


Get Started with Grouparoo
Start syncing your data with Grouparoo Cloud
Start Free TrialOr download and try our open source Community edition.