The Grouparoo Blog
Yesterday, I was writing some blog posts. In grand engineer tradition, I got distracted while blogging and spent a few hours writing tools to increase blogging efficiency.
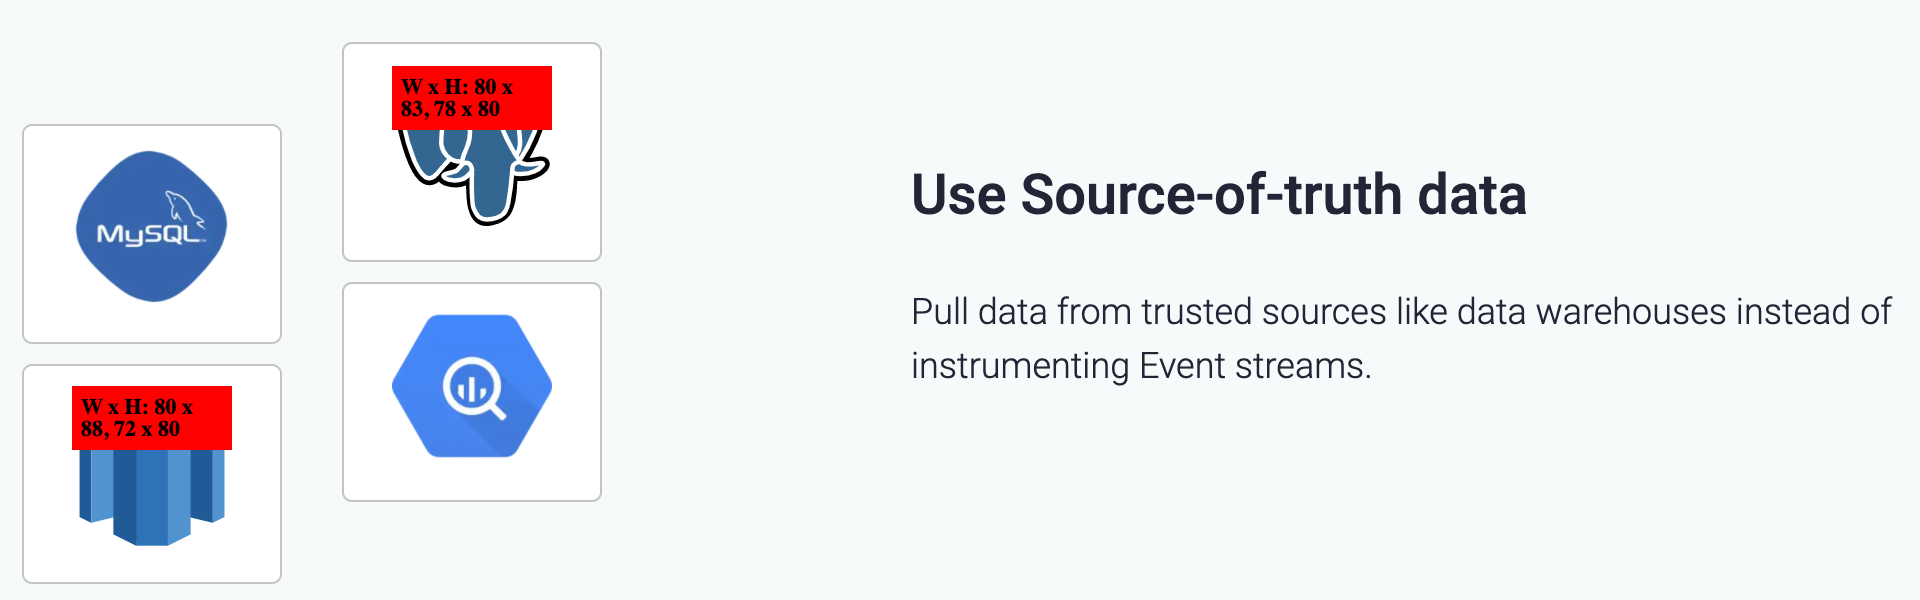
Specifically, I was having trouble knowing the correct width and height props to put on the screenshots I was making for the blog post. I would take the screenshot and then use image tools and even a spreadsheet to figure out the right ratio/dimensions for how I wanted it to show up in the UI.
Now, if I get the dimensions wrong (or just want to see the correct ones), it will show it as a little red overlay in development. The banner uses the passed in dimensions to suggest changes that would match either the given height or width.

With the correct sizing, it goes away.
Migration
Next.js has a fancy new image component that requires you pass in these width and height props. These are likely necessary to prevent the page shifting as images load, but if they do not match the ratio of the actual image, it will become distorted as above.
When I was implementing the next/image component the first time, we had to add these props for all of our website images. I made this script that went through all of them and output the true widths, making this spreadsheet.

Then, I went through all our images and filled in the dimension (maxWidth or maxHeight) that I wanted to set. It then gave me the other dimension.
This worked pretty well for the migration.
However, the spreadsheet wasn't working for me as I was writing blog posts, though. I was figuring out the size from the MacOS "Get Info" menu item and adding them to the sheet manually. It took me out of the flow of writing.
Implementation
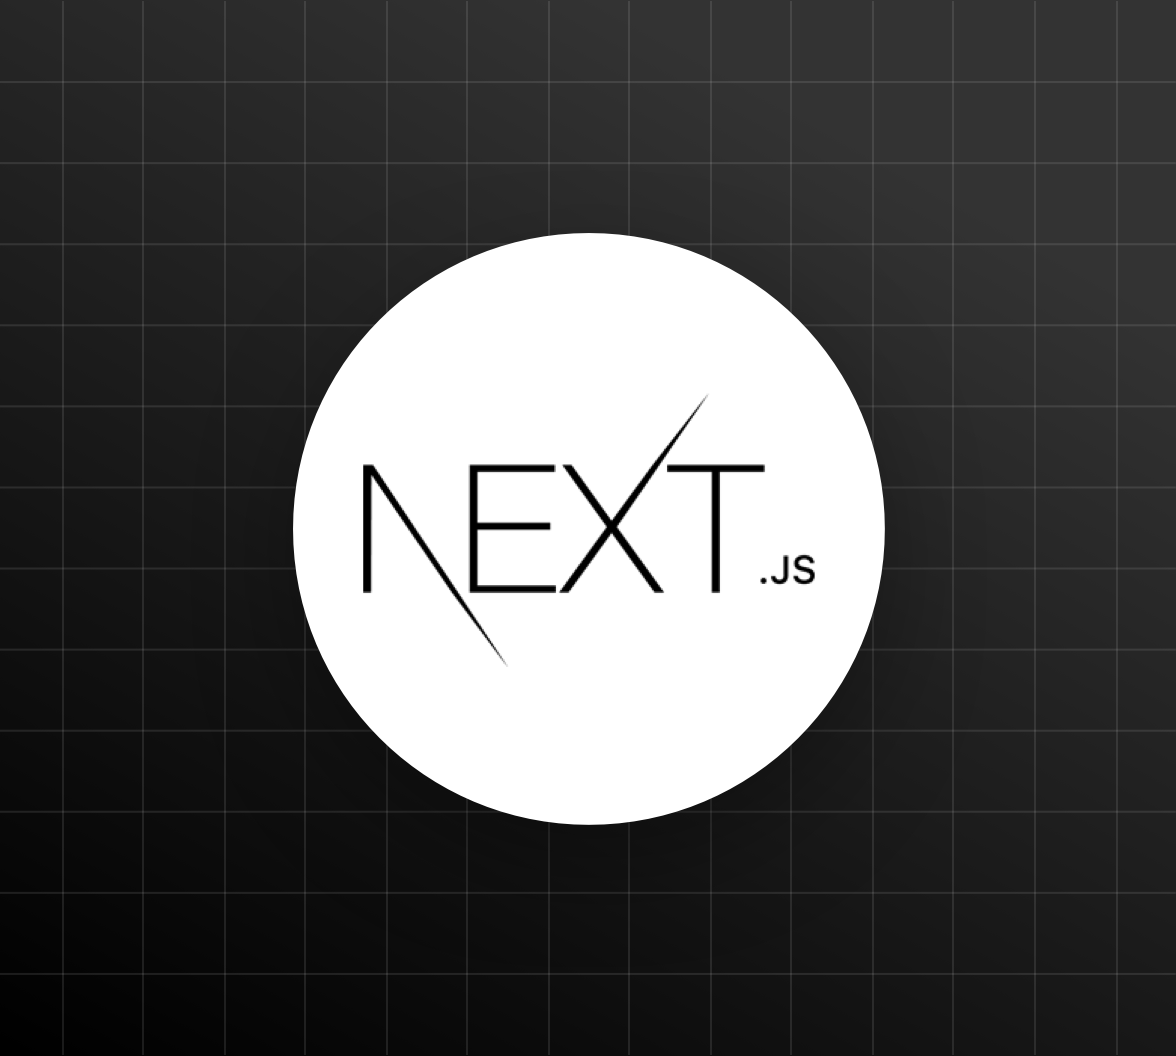
For example, the code for the logo above was the following:
<Image src="/images/logos/nextjs.png" height={300} width={600} />
The banner is accomplished with a new DebugImage component that adds an an API request after the page loads. The server-side code seems to be needed to actually inspect the actual image on disk.
The component checks with the API:
GET /api/imgdim?w=600&h=300&url=%2Fimages%2Flogos%2Fnextjs.png
{
  "optimized": false,
  "message": "W x H: 600 x 539, 334 x 300",
  "dimensions": [
    { "w": 600, "h": 539 },
    { "w": 334, "h": 300 }
  ],
  "ratio": 1.1136363636363635
}
When it gets fixed (by changing the width to 334):
GET /api/imgdim?w=334&h=300&url=%2Fimages%2Flogos%2Fnextjs.png
{
  "optimized": true,
  "message": "Optimized",
  "dimensions": [
    { "w": 334, "h": 300 },
    { "w": 334, "h": 300 }
  ],
  "ratio": 1.1136363636363635
}
The code in the DebugImage component takes the following steps:
- Doesn't do anything unless the
NODE_ENVis "development" - Otherwise, wraps the component in a
divwith no border, padding, etc - If the image is not
optimizedshows the message in the top left corner
Conclusion
I guess now, I have some work to do...
Maybe there's also a way to catch this in our test suite. There seems to be a few options there:
- Use selenium and look for this banner, but that would be pretty slow
- Compile the site, but with a stubbed
Imagecomponent that records what's being used. Compare those dimensions to the ones on disk.
Anyway, I made my original blog post, will make future ones easier, and even got an extra one out of it!
Here is the pull request with all the code.


Tagged in Engineering
See all of Brian Leonard's posts.
Brian is the CEO and co-founder of Grouparoo, an open source data framework that easily connects your data to business tools. Brian is a leader and technologist who enjoys hanging out with his family, traveling, learning new things, and building software that makes people's lives easier.
Learn more about Brian @ https://www.linkedin.com/in/brianl429


Get Started with Grouparoo
Start syncing your data with Grouparoo Cloud
Start Free TrialOr download and try our open source Community edition.