Sources (Enterprise Edition)
Last Updated: 2021-10-13Now that you've added an App (see here if you haven't), your next step is to create a Source. A Source is a definition for how you pull data from an App into Grouparoo. See this doc to learn more about the core concepts in Grouparoo.
Step 1: Choose an App
To start, you'll click on the Sources navigation in the left-nav and click Add new Source.

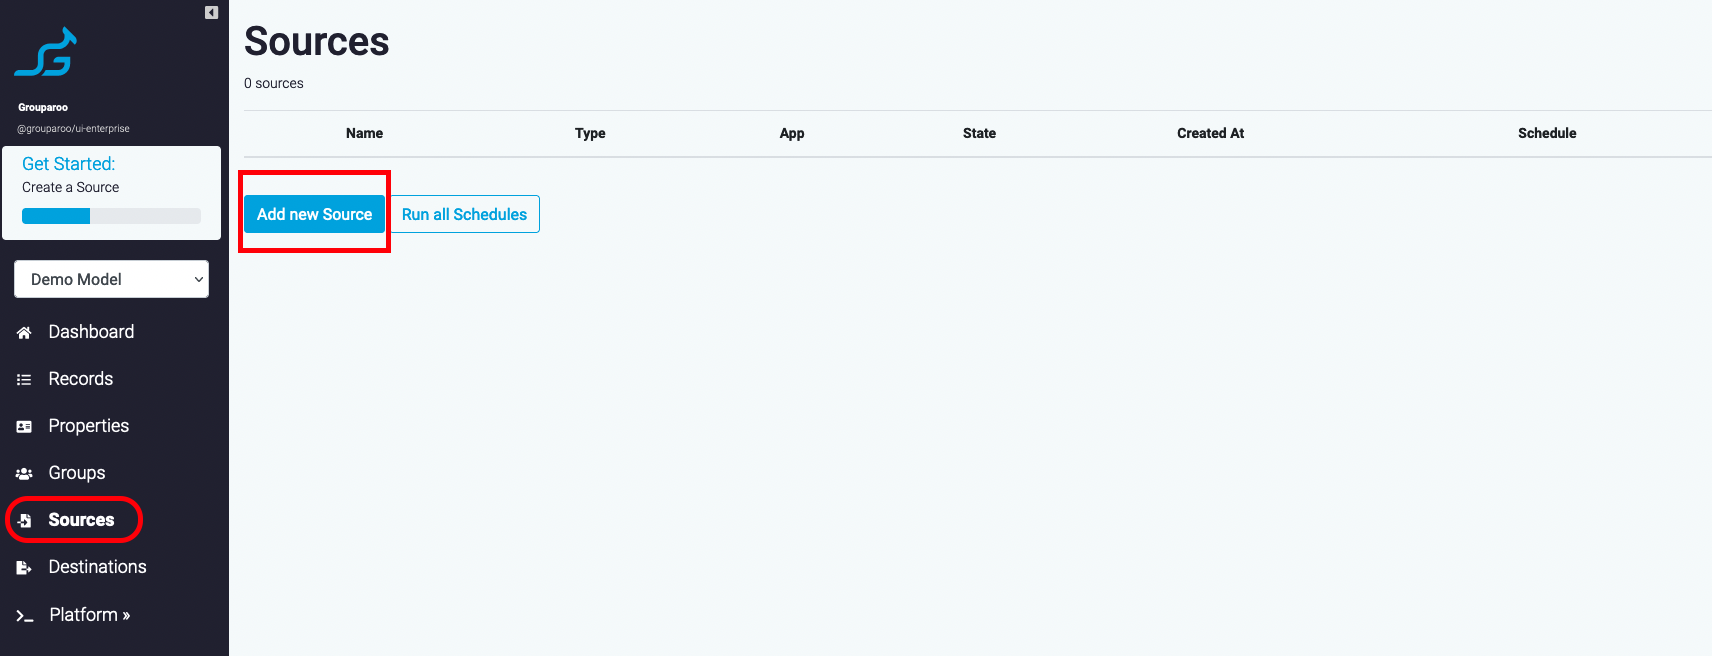
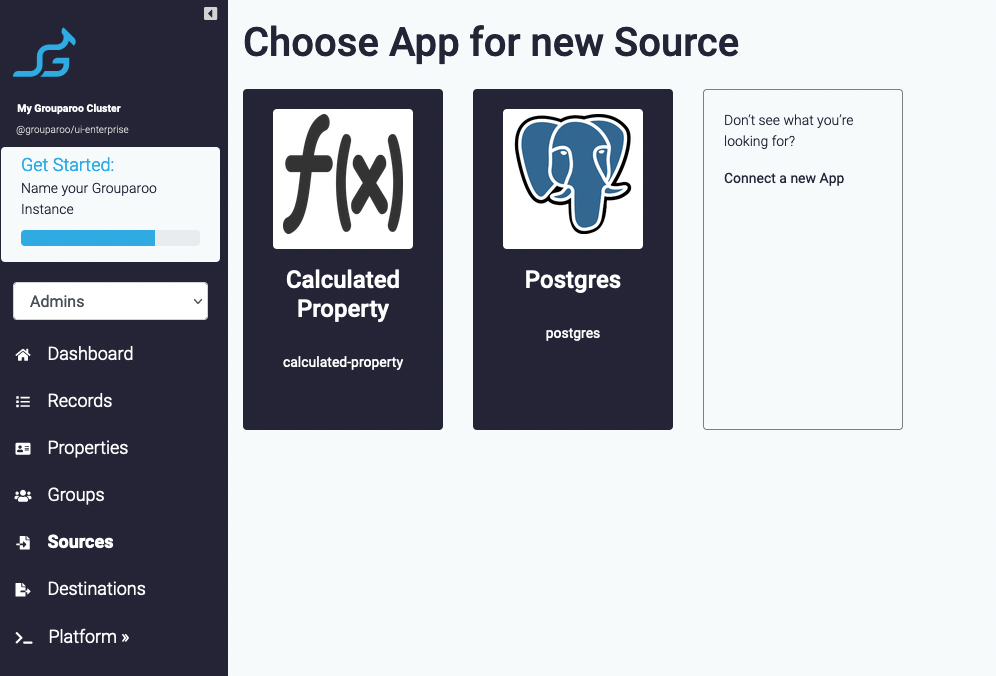
Sources are created using Apps. Next, choose the kind of Source you'd like to create from the list of available Apps. The choices shown will be based on which Apps you've already connected. If you don't see the App you want to use, you can add a new App.

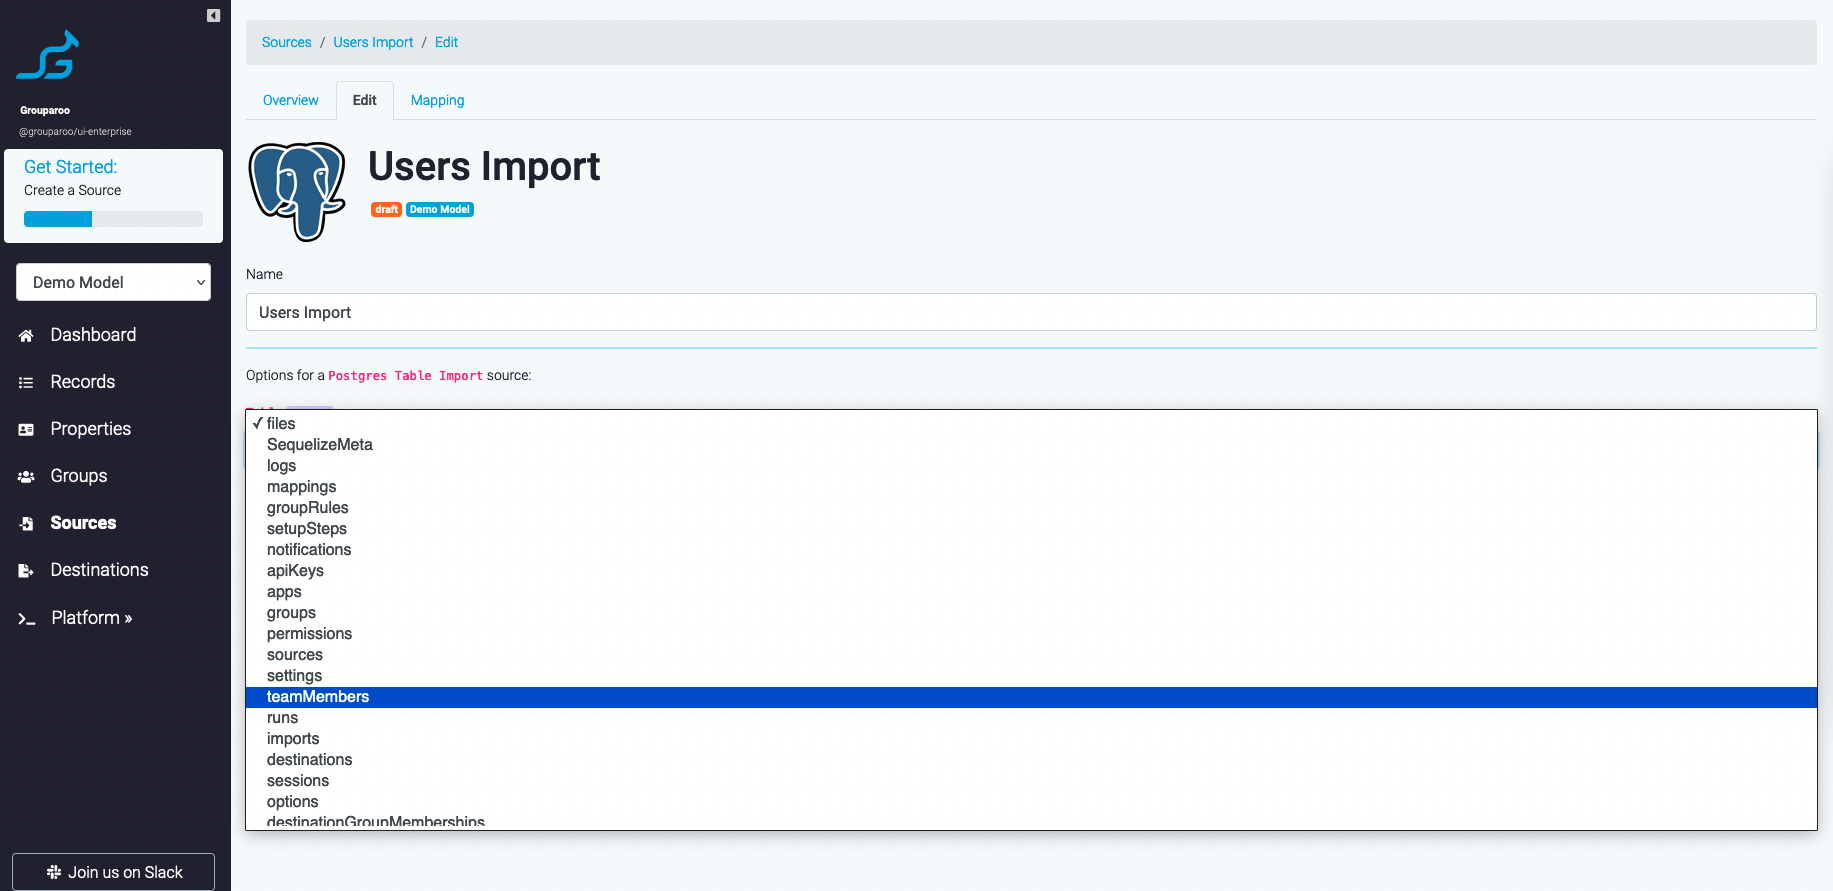
Step 2: Configure Your Source
Once you've chosen the App, fill in the appropriate configuration values for your Source. This will determine what information from the Source gets imported into Grouparoo.

Step 3: Connect this Source to Grouparoo Records
After you've chosen the Source that contains your user data, you will need to indicate what makes your users unique. Often a unique identifier is a user id, uid, or email. If you already have a unique Record Property defined in Grouparoo, you can map your Source to that Record Property. If your Source has a new way of identifying records uniquely, you can create a new unique Record Property.

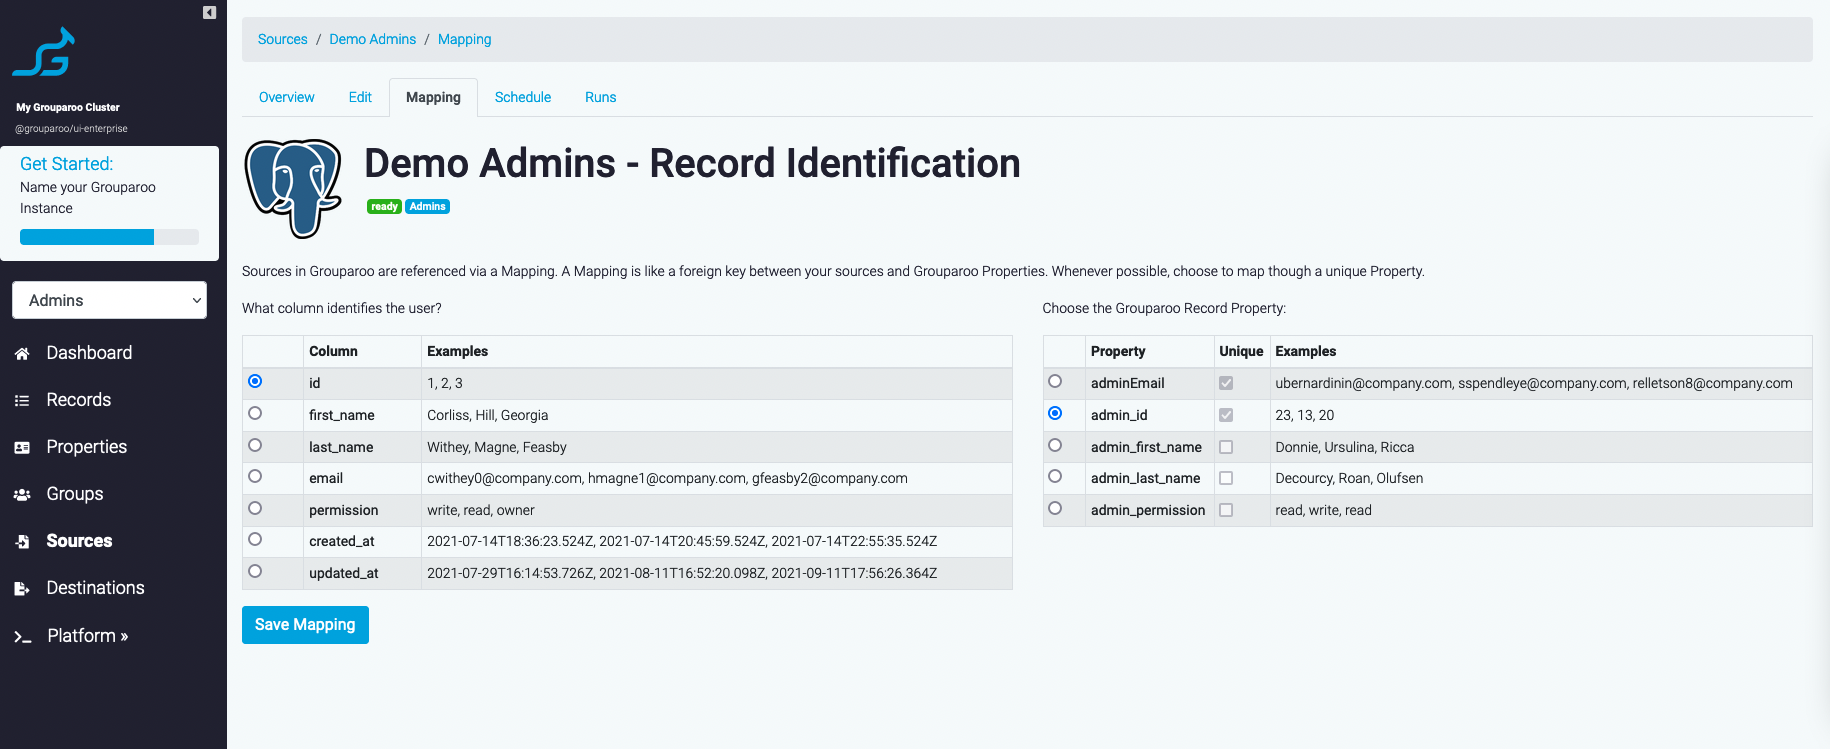
Check out the Record Properties Config Guide for more information.
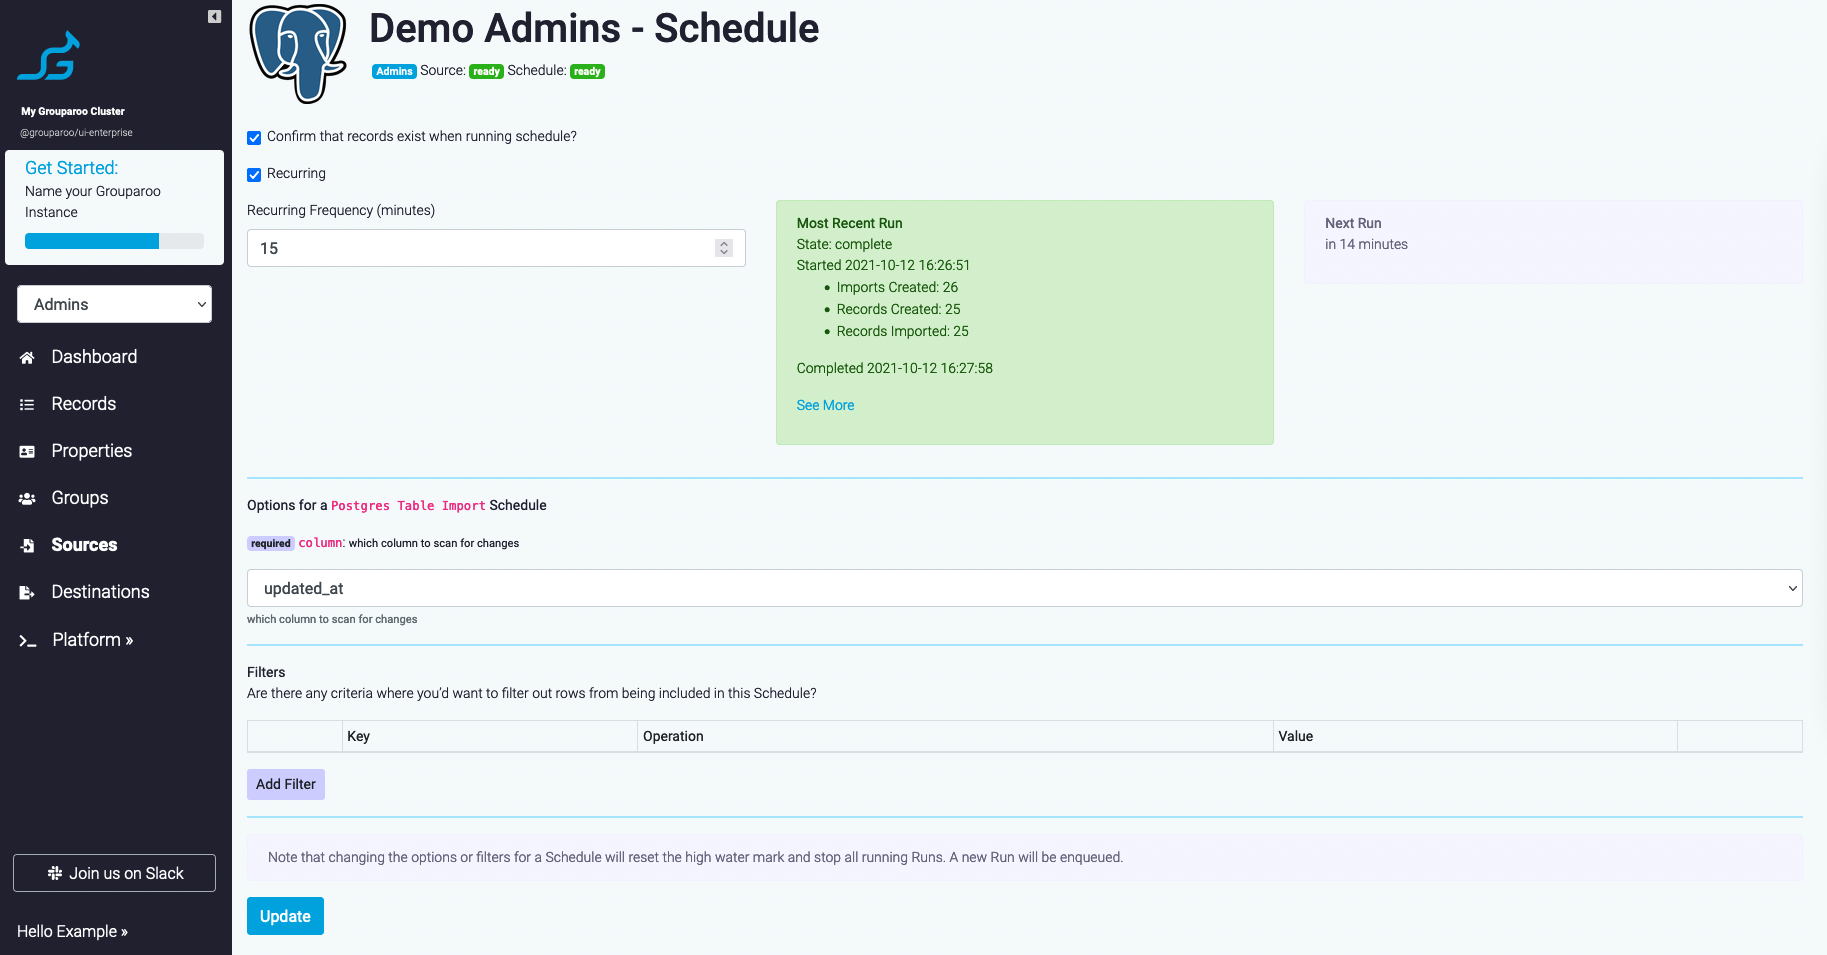
Step 4: Add a Schedule
A Schedule defines how often Grouparoo will check your Source for new data. When there are additions or changes in your data Source, Grouparoo will pull that data in based on your Schedule settings.
You can choose how often Grouparoo will check your Source for new data. You will also point Grouparoo to the column that indicates when a row in your users table has been updated, such as an updated_at timestamp column.

Next Steps
Once you've created a Source, you'll probably want to add more Record properties to it.
The real magic happens when you put your users into Groups, which you can then export. Once you have all the appropriate properties, you'll want to create some Groups of users.
And once you have those Groups, you can create a Destination to export data from Groups. (Just remember to create an App for your Destination.)
Having Problems?
If you are having trouble, visit the list of common issues or open a Github issue to get support.